A guide to the learner management system - unlimited subscription
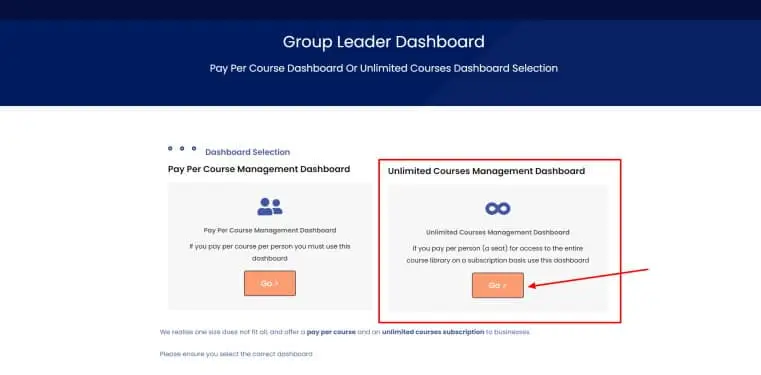
Add a classroom - One student per classroom - Think of it as private tuition
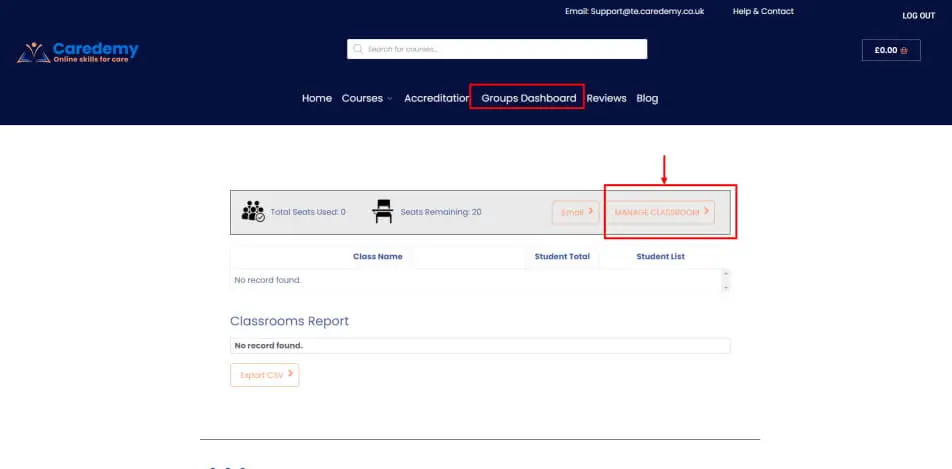
Click on Manage Classrooms tab then
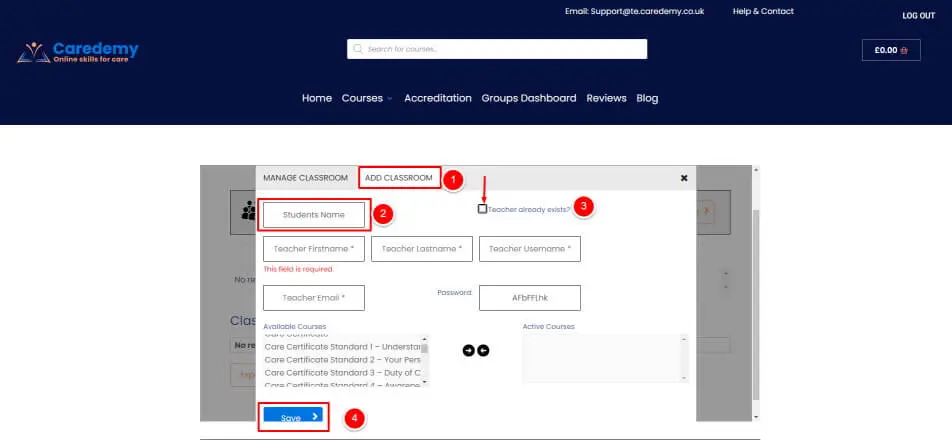
1. Select the add a classroom tab
2. Enter the students name
3. tick the box and select the teacher and
4. Save
You can also select the courses you want to add for this learner here too (shift key or Ctrl key for multiples)
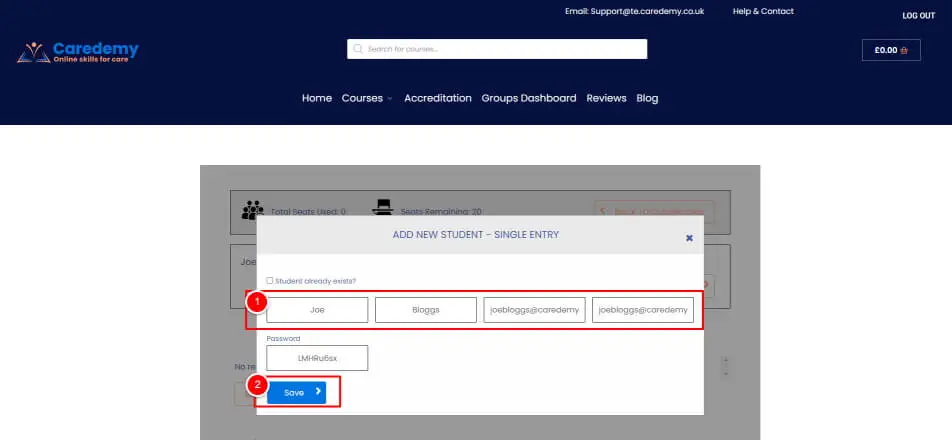
Add a student to the classroom you just created
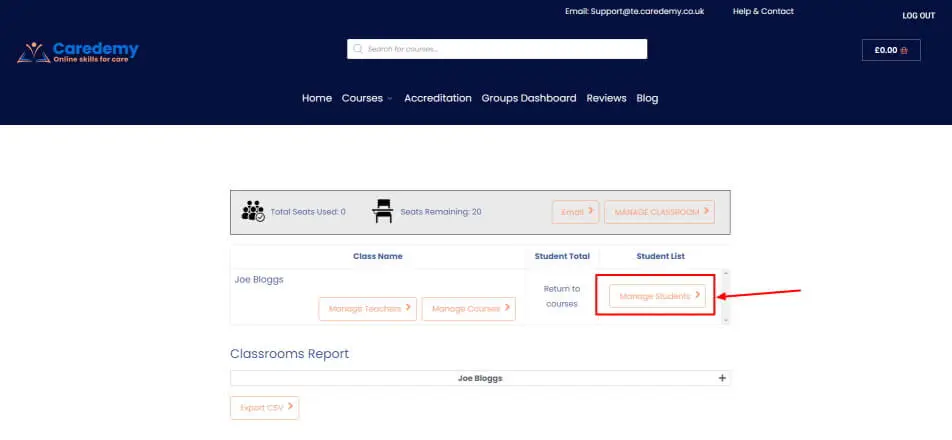
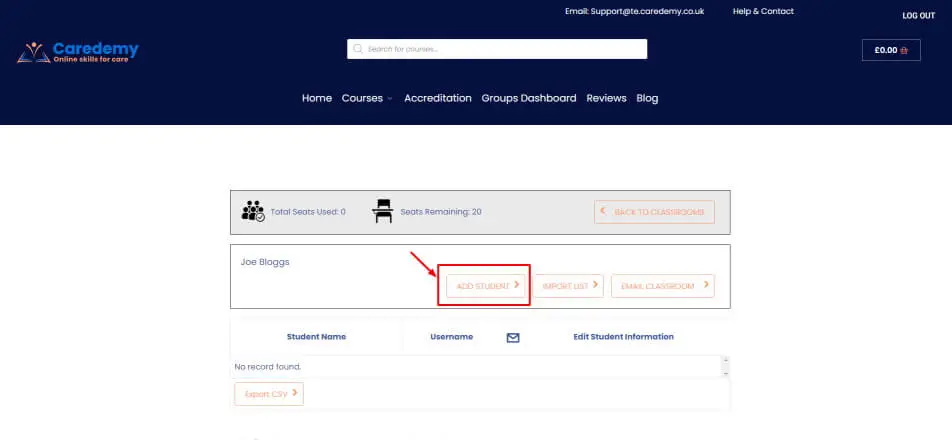
click manage students then add a student
Enter the students first and last name , and their email address for the user name and email box, then save
The learner will automatically be notified of login details and as you allocate courses.
Add or remove courses
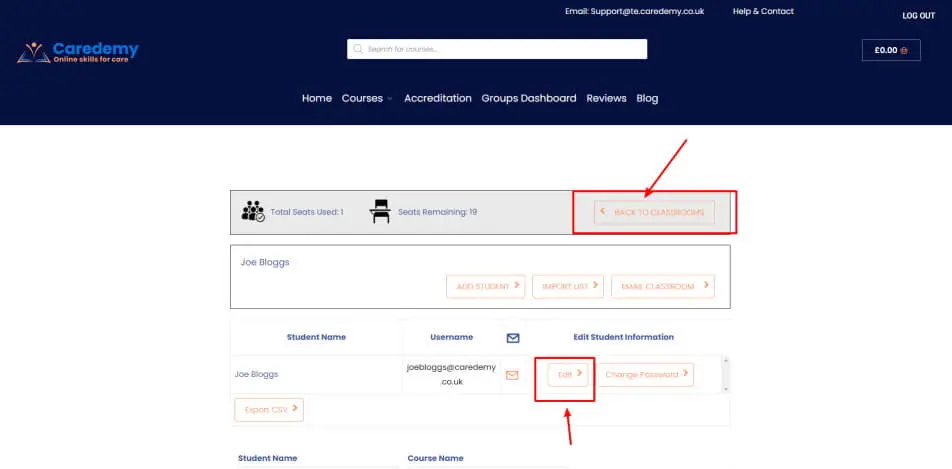
Click back to classrooms
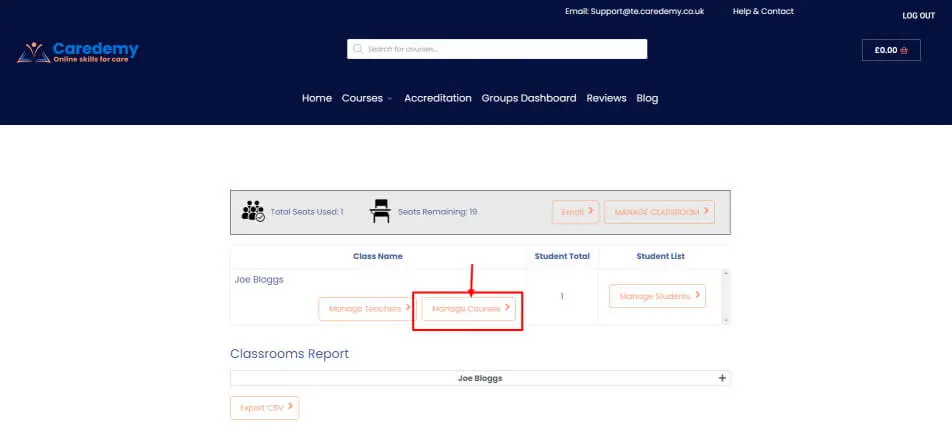
Manage courses
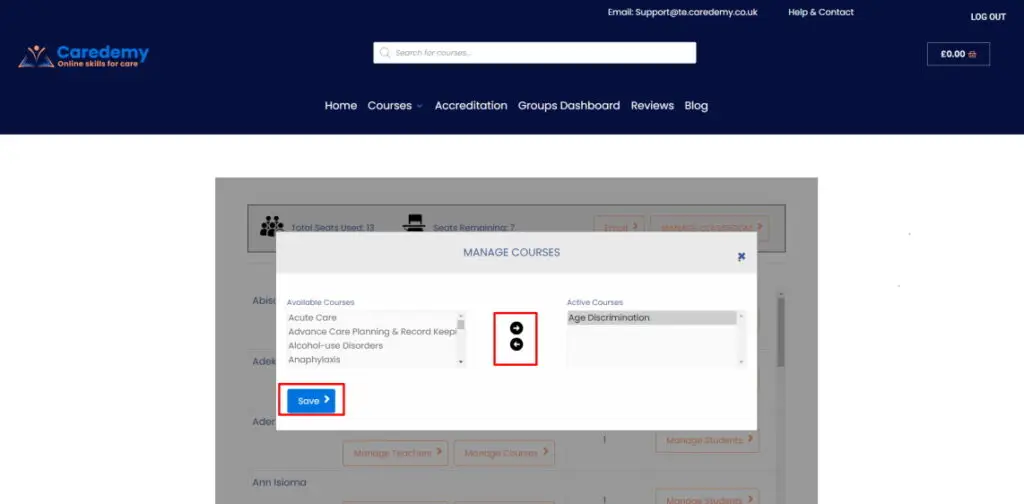
Courses on the left side are unassigned, the right side is assigned, add or remove via the arrows and click save once done
The ctrl and shift keys are your friend, use them to help to bulk allocate course.
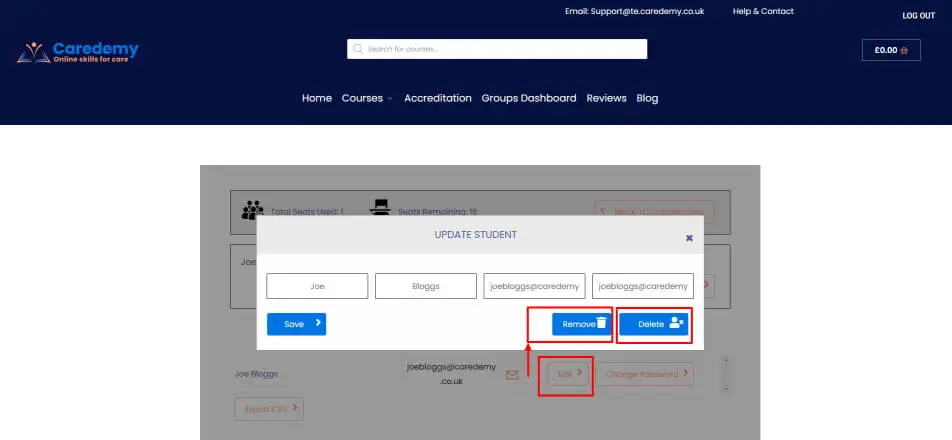
The edit button on the manage student page allows you to edit the students details
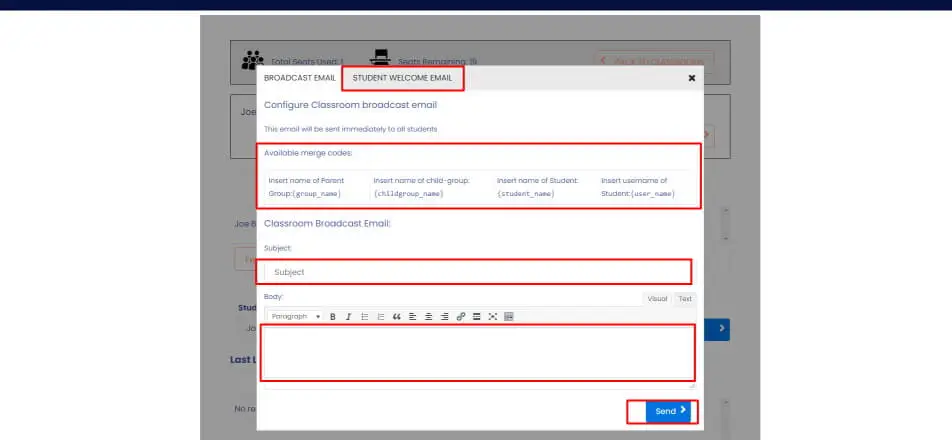
Bespoke welcome email
Go to manage students > Email> Student welcome email
Create a bespoke email for your students when you set them up, be sure to use the relevant short codes. Send a support email if you would like us to help. There is already a default email in place, its there to customise if you want to
Delete or remove a student
From the manage students page you can "edit" the students details, you can also remove or delete, freeing up a seat allocation for you to reuse. Remove keeps the learner on our system, but you will not have access to them any longer, freeing up a seat. Delete totally removes all information from the system. Once deleted the information can not be restored.
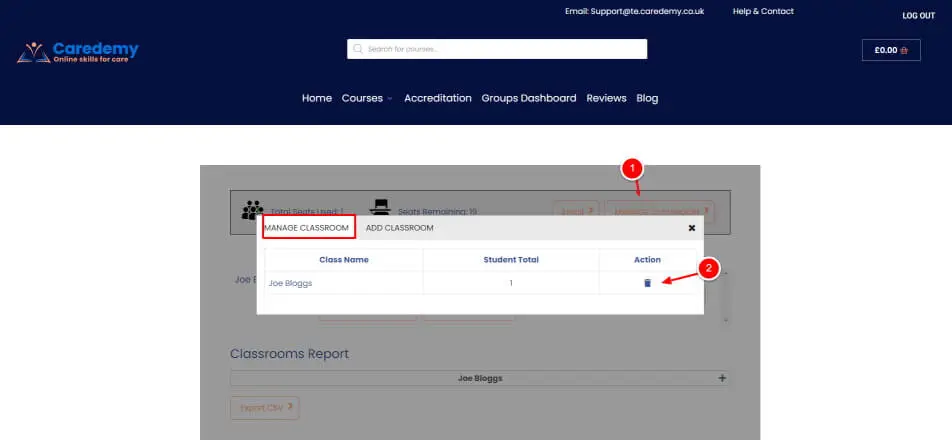
Alternatively from the front dashboard page, click on manage classrooms and you can delete that classroom too. The learner must be removed first from a classroom before the classroom can be deleted


